YPTM inverval 기능 추가
현재 구상도
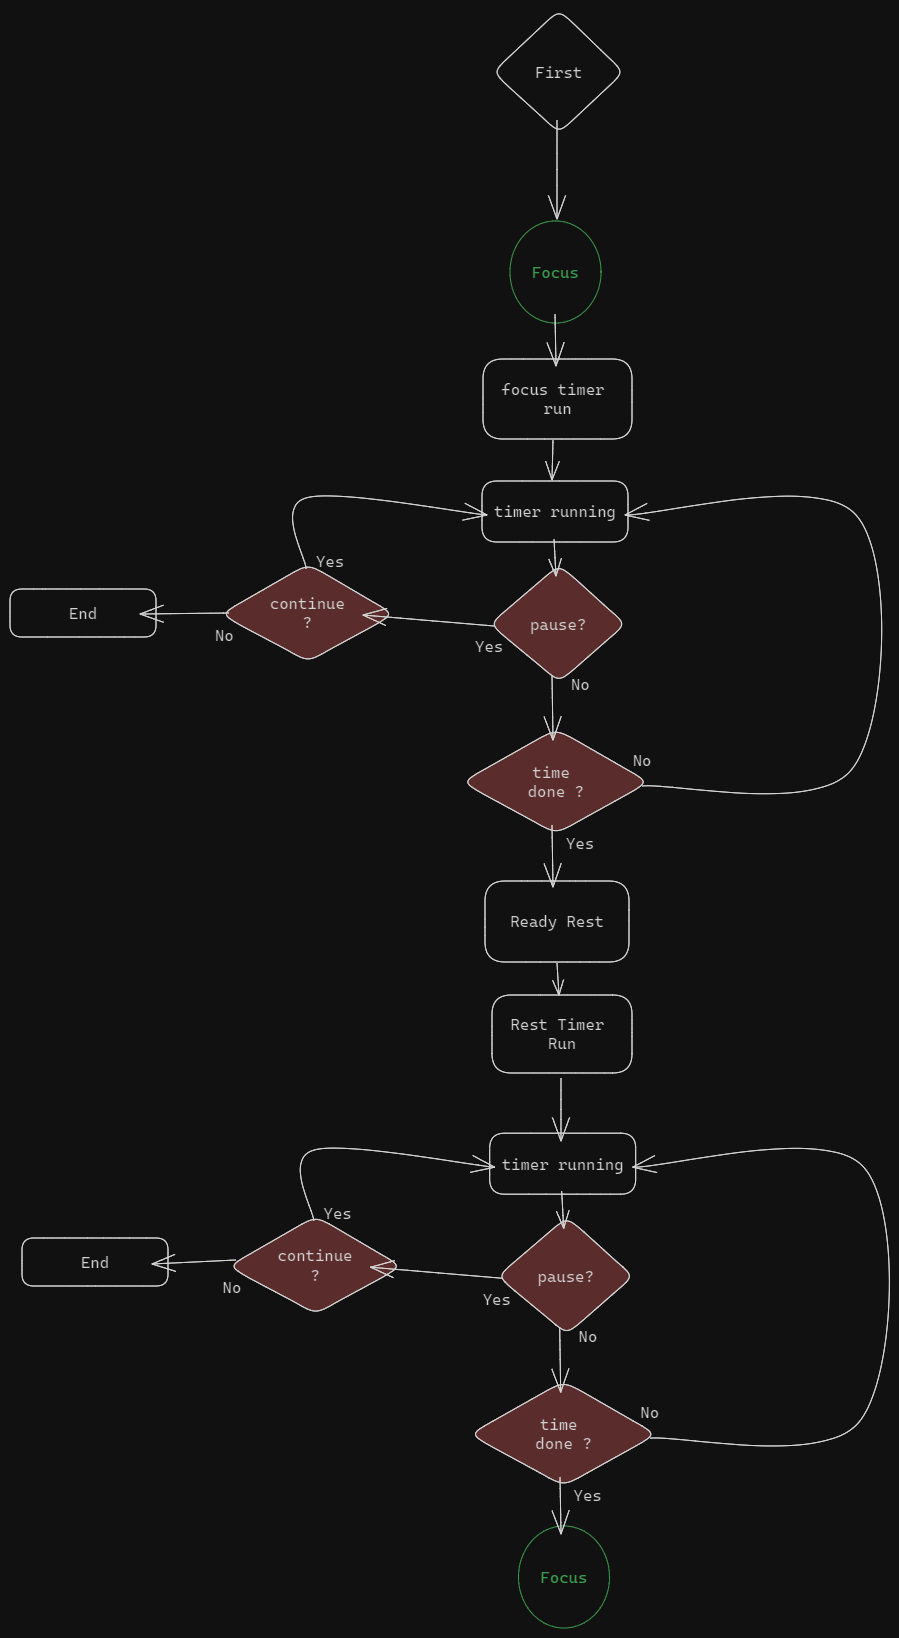
- Focus 타이머 시작
- 타이머 진행 (Pause 분기)
- Focus 타이머 끝
- Rest 타이머 대기 상태
- Rest 타이머 시작
- 타이머 진행 (Pause 분기)
- 타이머 끝
- 다시 Focus 타이머 준비
- 위의 Flow 가 돌아가게끔 개발을 하고자 간단하게 도식화 해보았다.
- 시간 설정은 추후 구상하여 추가
Interval 설정
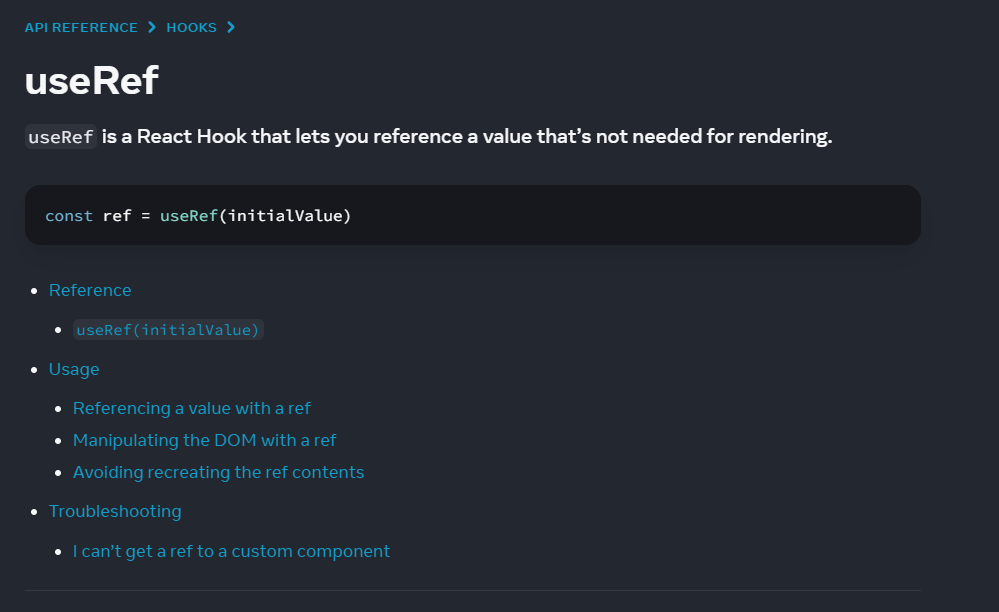
React의 useRef hook의 기능을 톡톡히 맛보았다.
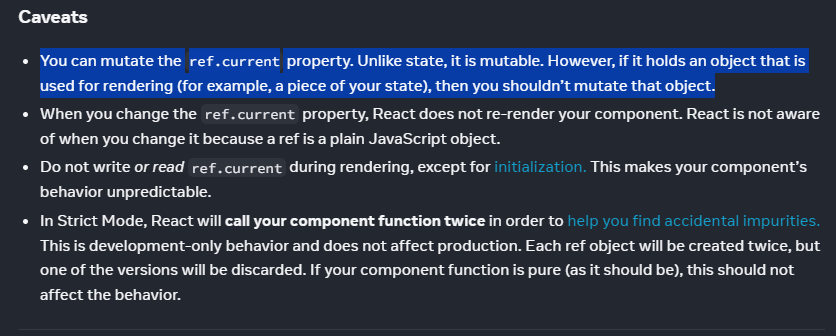
- 2번 째 사진 1~2문단이 useRef hook을 사용한 결정적인 이유
mutable 한 값을 관리하고 싶을 떄는 state같은 rendering에 영향을 주는(Re-rendering) hook 이 아닌,
변화를 감지는 하지만 React가 re-render까지는 하지 않기 때문에 (순수한 JS Object라고 한다?)
나는setInterval과setTimeoutAPI를 사용해서 사용자가 원할때 시작하고, 중지한 후에는 중지시점의 타이머 시간부터 이어서 할 수 있는 것을 원했기 떄문에, useRef를 선택했다. (이게 정석일까?)
1
2
3
4
5
6
7
8
9
10
11
12
13
14
15
16
17
18
19
20
21
22
23
24
25
26
27
28
29
30
31
32
33
34
35
36
37
38
39
40
41
42
43
44
45
46
47
48
49
50
51
52
53
54
55
56
57
58
59
60
61
62
63
64
65
66
67
68
69
70
71
72
73
74
75
76
77
78
79
80
81
82
83
84
85
86
87
88
89
90
91
92
93
94
95
96
97
98
99
100
101
102
103
104
105
106
107
108
109
110
111
112
113
114
// Timezone.jsx
import { useRef, useState } from "react";

import { excuteBtnStyle } from "../assets/Style.js";

export default function TimeZone() {
  const [timer, setTimer] = useState({
    time: 0.1 * 1000 * 60,
    run: false,
    max: 0.1 * 1000 * 60,
  });
  const [timeState, setTimeState] = useState({
    run: false,
    pause: false,
  });

  const [timeCategory, setTimeCategory] = useState({
    focus: false,
    rest: true,
  });

  const timerInterval = useRef(null);
  const timerTimeout = useRef(null);
  const displayMinute = Math.floor(timer.time / (1000 * 60));
  const displaySeconds = Math.floor((timer.time % (1000 * 60)) / 1000);

  function cleareTimes() {
    clearInterval(timerInterval.current);
    clearTimeout(timerTimeout.current);
  }

  function timeEnd() {
    setTimeCategory((prevCategories) => {
      return {
        ...prevCategories,
        focus: !prevCategories.focus,
        rest: !prevCategories.rest,
      };
    });
  }
  function handleRun() {
    cleareTimes();

    if (!timeCategory.focus && !timeCategory.rest) {
      //첫수행
      setTimeCategory((prevCategories) => {
        return {
          ...prevCategories,
          focus: true,
          rest: false,
        };
      });
    }

    setTimeState((prevState) => {
      return {
        ...prevState,
        run: true,
        pause: false,
      };
    });
    timerInterval.current = setInterval(() => {
      setTimer((prevTime) => {
        // 이전 시간에서 1000ms(1초)를 빼서 재개
        return {
          ...prevTime,
          time: prevTime.time - 1000,
        };
      });
    }, 1000);

    timerTimeout.current = setTimeout(() => {}, timer.time);
  }

  function handlePause() {
    cleareTimes();

    setTimeState((prevState) => {
      return {
        ...prevState,
        pause: true,
        run: false,
      };
    });
  }

  return (
    <section id="timezone">
      <progress value={timer.time} max={timer.max}>
        {timer.time}
      </progress>
      <div id="user-selection">
        {((!timeState.run && !timeState.pause) || timeState.pause) && (
          <button id="btn-run" className={excuteBtnStyle} onClick={handleRun}>
            Run
          </button>
        )}

        {timeState.run && (
          <button
            id="btn-pause"
            className={excuteBtnStyle}
            onClick={handlePause}
          >
            Pause
          </button>
        )}
      </div>
      <div id="info">
        <p>{`${displayMinute}분 : ${displaySeconds}초`}</p>
      </div>
    </section>
  );
}
- 진짜 내가 개못한다는걸 또한번 깨닫게 되긴 했다.ㅎㅎ
- 2번 째 사진 1~2문단이 useRef hook을 사용한 결정적인 이유
Component 구조
- App.jsx에서 관리하는 State가 없게 하고 싶은 이상한 욕심이 들었다.
- 그래서 TimeZone 이라는 컴포넌트를 만들어서 실직적으로 이 컴포넌트에서만 State가 다루어지게 하려고 한다.
그래도 개발하다가 필요하면 App 단위로 State를 넘겨서 전체적으로 관리하게 할것이다.
지금은 App.jsx 안에 TimeZone과 Header만 Import 된 상황
1
2
3
4
5
6
7
8
9
10
11
12
13
14
15
16
17
18
19
20
21
22
23
📦 yptm
├─ .eslintrc.cjs
├─ .gitignore
├─ README.md
├─ index.html
├─ package-lock.json
├─ package.json
├─ postcss.config.js
├─ public
│  ├─ Layout1.png
│  └─ vite.svg
├─ src
│  ├─ App.jsx
│  ├─ assets
│  │  ├─ Style.js
│  │  └─ timerScheme.js
│  ├─ components
│  │  ├─ Header.jsx
│  │  └─ TimeZone.jsx
│  ├─ index.css
│  └─ main.jsx
├─ tailwind.config.js
└─ vite.config.js
©generated by Project Tree Generator
느낀점
- 진짜 아주아주 남들한테는 쉬운 구현이더라도, 내손으로 제로부터 구현하려고하니까 생각이상으로 더 복잡하고 어려웠다.
- 내가 정말 못한다는걸 다시 한번 뼈저리게 느꼈다.
- 근데 하다보니까 재미는 확실히 있다. (성취감이 쩔어…)
- 일단 완성까지 달려보자
이 기사는 저작권자의 CC BY 4.0 라이센스를 따릅니다.